Using Entra ID (formerly Azure Active Directory) with Striim Cloud
You can configure Striim Cloud to allow users in your organization to log in using Azure AD single sign-on (SSO). This requires you to create a SAML application in Azure AD, assign that application to your users, and configure Striim Cloud to trust Azure AD as an identity provider (IdP). For more information, see Enable single sign-on for an enterprise application.
To add an enterprise application to your Azure AD tenant, you need an Azure AD user account with one of the following roles: Global Administrator, Cloud Application Administrator, or Application Administrator.
Create a SAML application in Azure
Log into Azure Portal, and choose Azure Active Directory service.
In the left menu, select Enterprise applications and the New Application option.
Choose the Create a new own application option. Enter the name for the Striim application and select the last radio button option, Integrate any other application you don't find in the gallery (Non-gallery). Click Create.
On the left panel, under Manage, choose Single sign on.
Choose SAML.
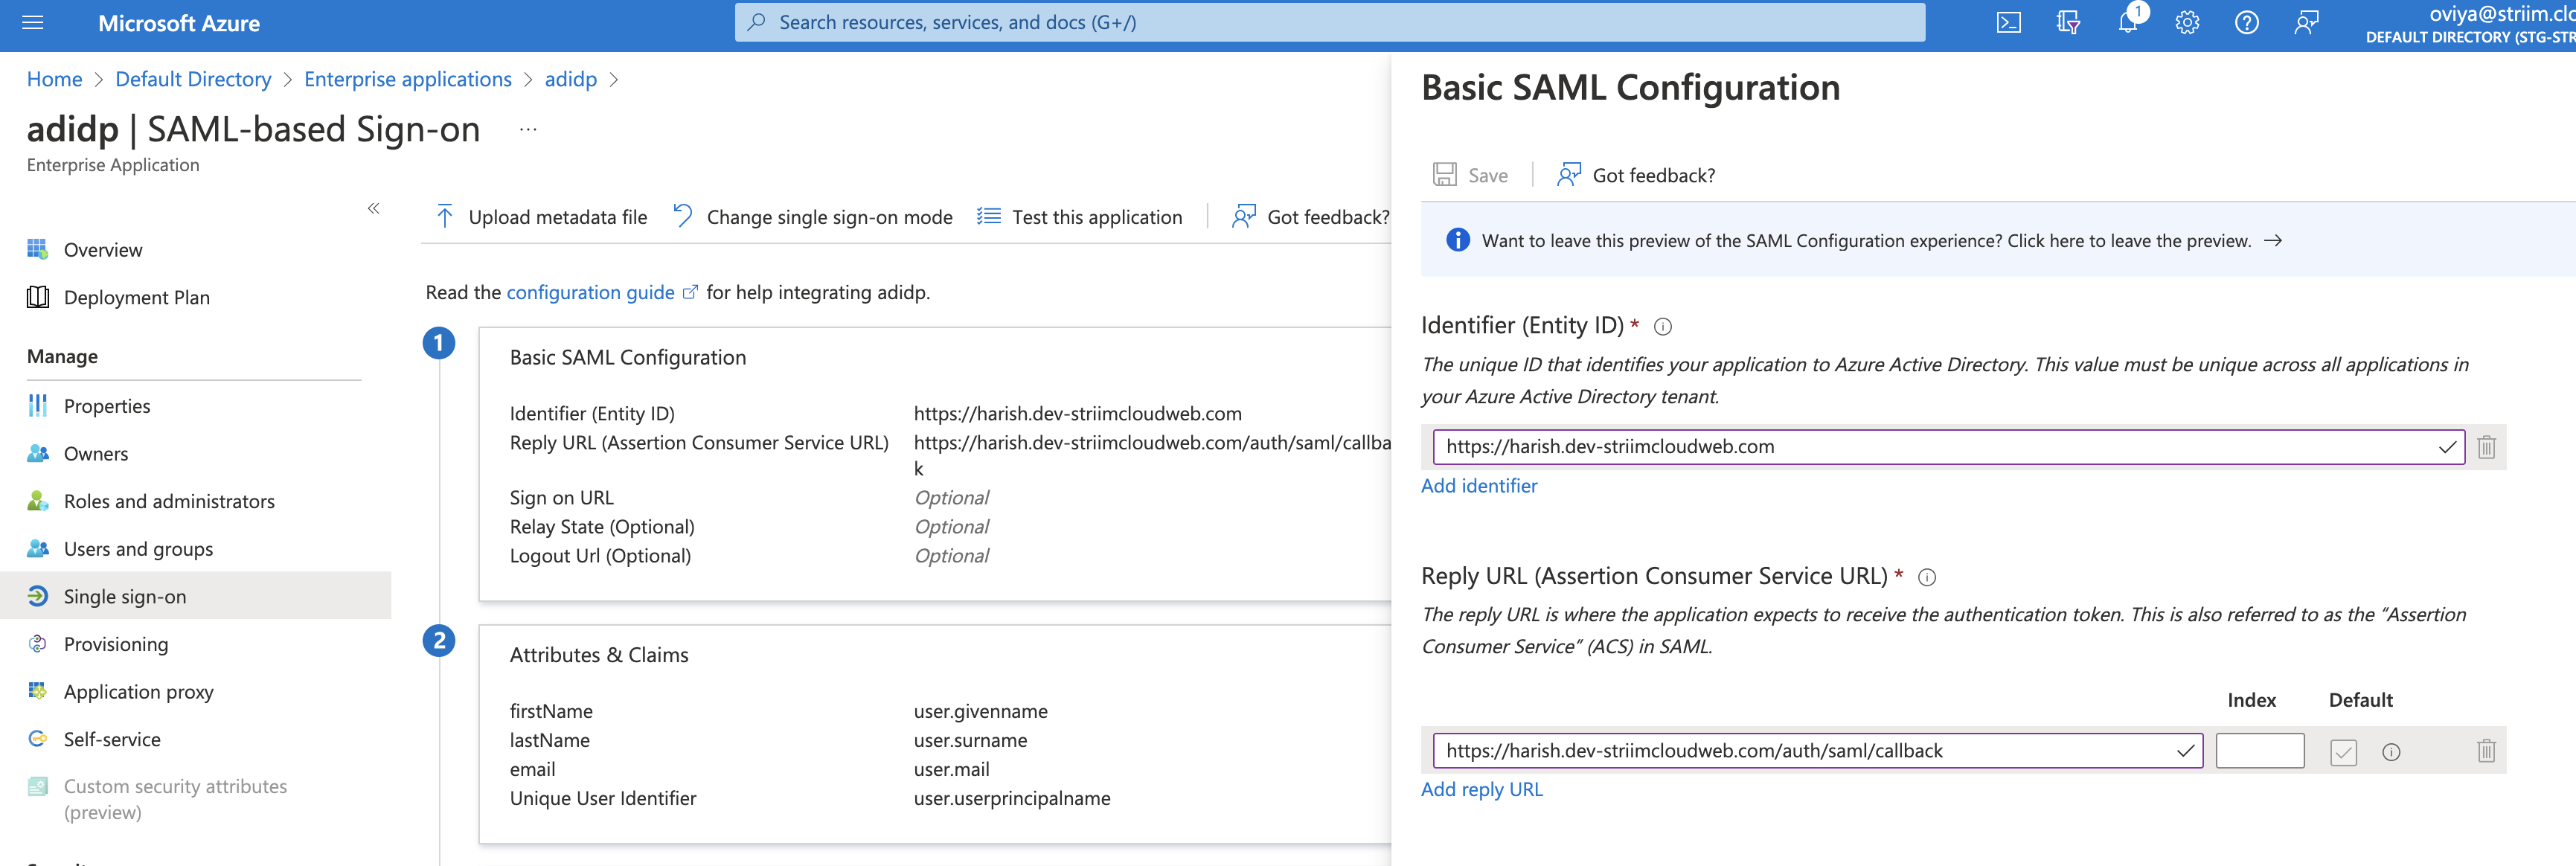
Edit the Basic configuration as follows:
Identifier (Entity ID): Identifier (Entity ID) : <your-Striim-account-URL>
Reply URL (Assertion Consumer Service URL): <your-Striim-account-URL>/auth/saml/callback

Click Save.
Edit the Attributes and Claims, and click on Add a new claim.
Create the following attribute statements for first name, last name and email, then click Next.
Name
Value
firstName
user.givenname
lastName
user.surname
email
user.mail
Download the X509 certificate in base64 format and extract the public certificate. One way to do so is to export the downloaded certificate as a PEM file using Keychain Access app in the Mac and apply this command on the PEM file.
Note the Login URL and AD Identifier URL (you will enter these values in your Striim application).
Assign users to the Striim application in Azure AD:
Choose the Users and groups option in the left panel under Manage. Select Add user/group, and click on the None Selected link.
In the left form, enter the name of the user you want to assign the application to and choose Select. Ensure that the user you are assigning to has their firstName, lastName and email (Striim mail ID) attributes set up in their user profile.
On the Add assignment page, choose the Assign button.
Configure Striim Cloud to trust Azure AD as an IdP
Log into your Striim Cloud account and click User Profile at the top right of the screen.
Go to the Login & Provisioning tab.
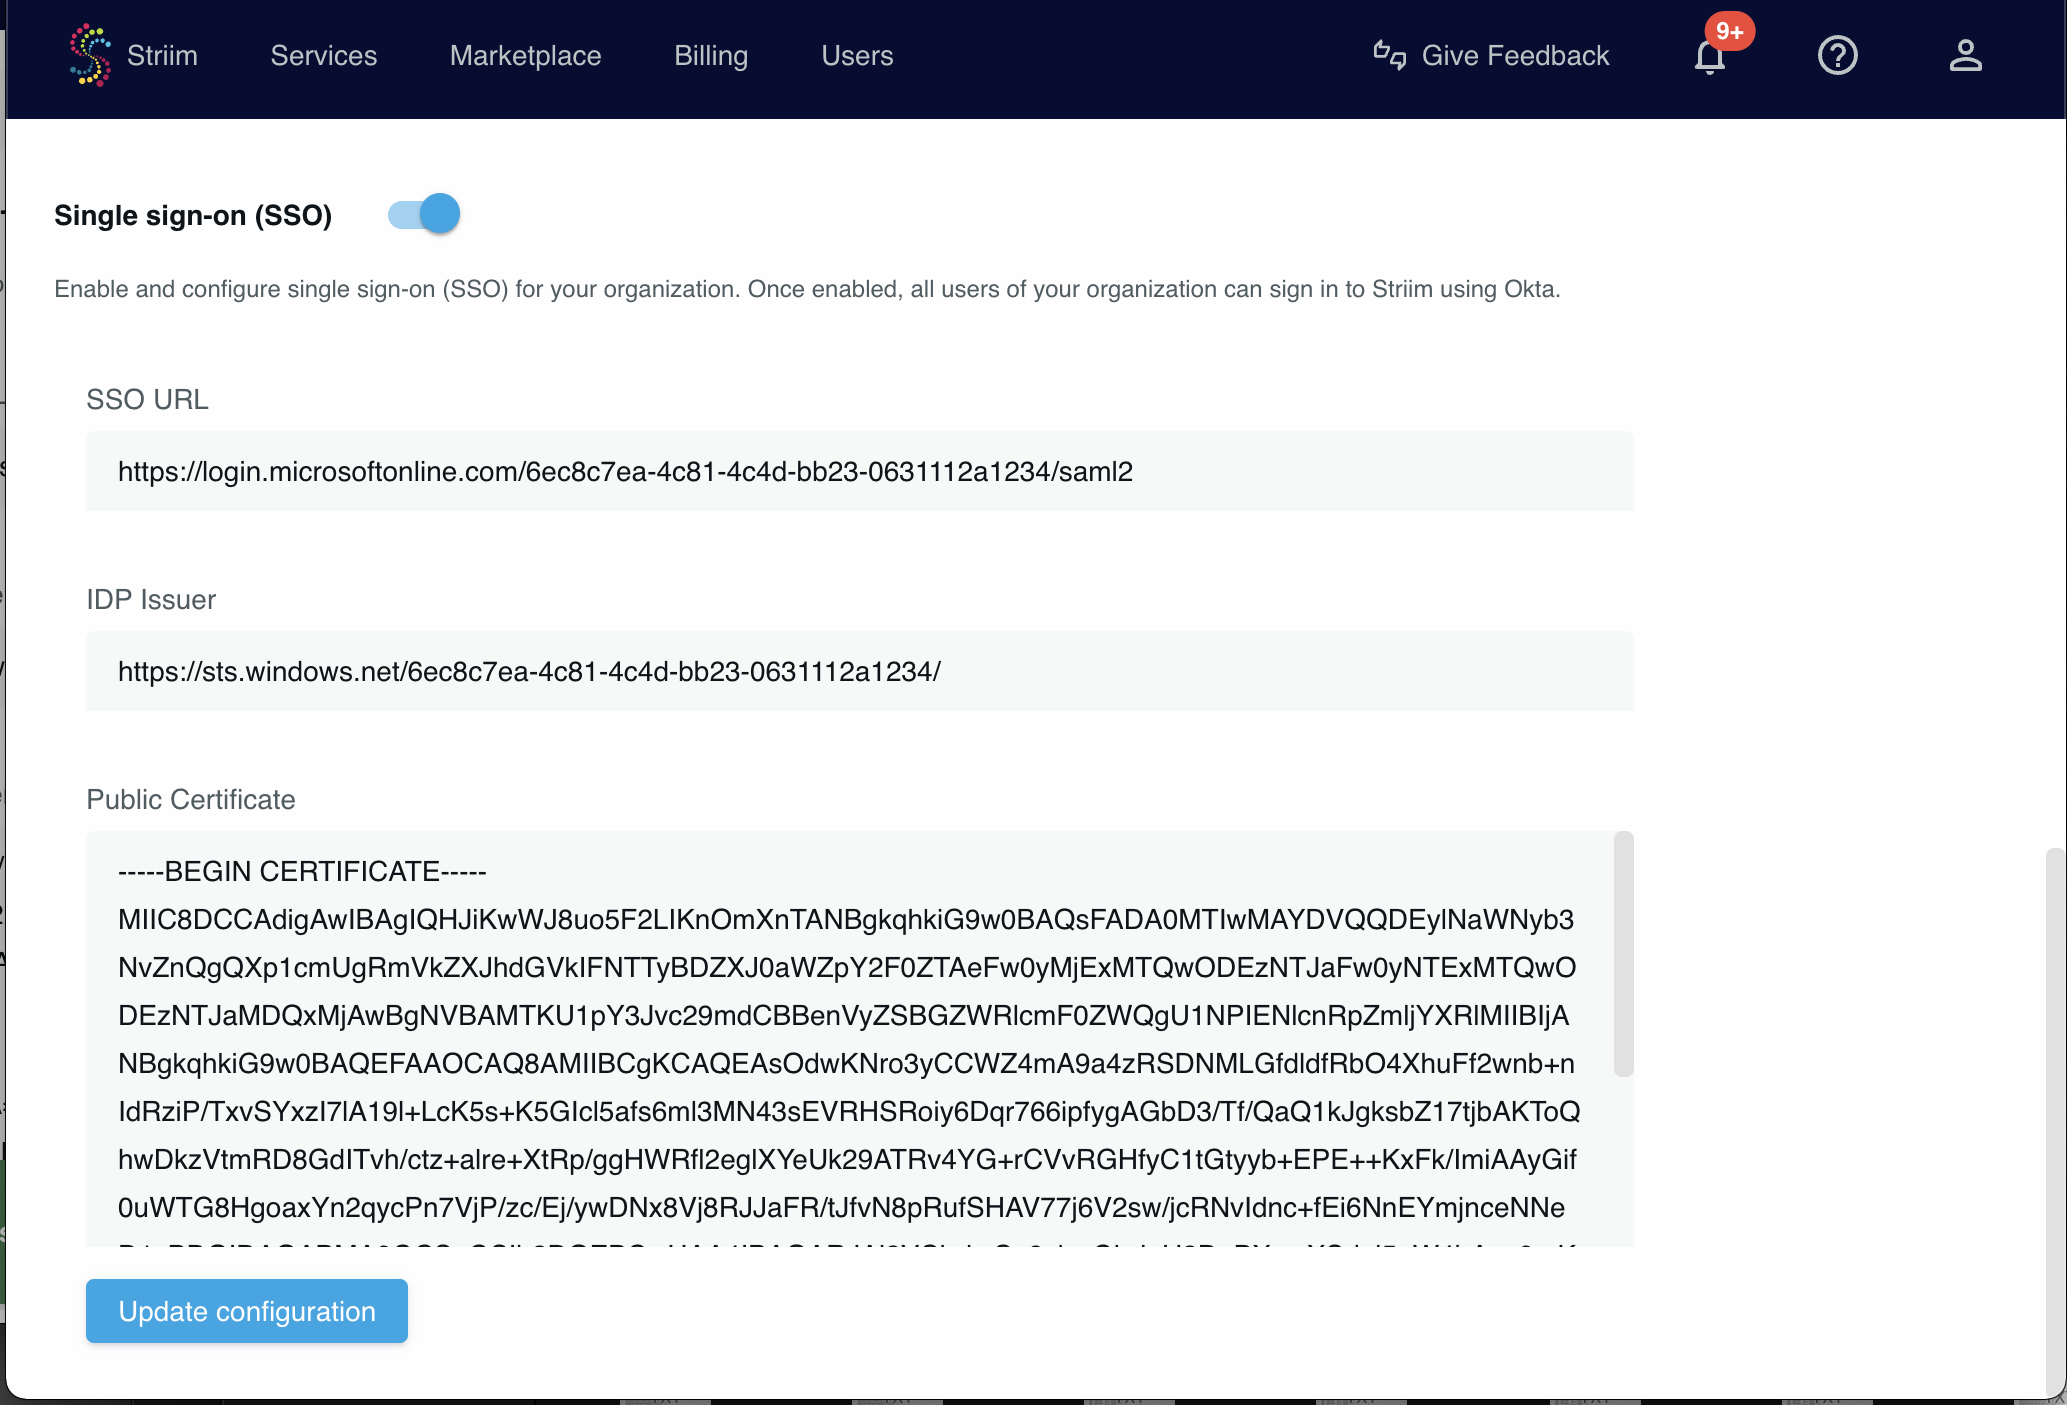
In the Single sign-on section paste the values noted in the previous procedure (see Step 11 above) into the SSO URL, IDP Issuer and Public Certificate fields. The Azure Login URL is the SSO URL, Identifier URL is the IDP Issuer and the X509 Certificate from the downloaded certification is the Public Certificate.
Click Update configuration.
Enable the Single sign-on (SSO) toggle near the top of the page.

Test logging in to your Striim Cloud account through Azure AD. Logout then go to the login page and select Sign in with SAML. You will be logged in through Azure AD. Users can access Striim Cloud through the Striim Cloud login page.